Managing Receipts
Viewing Receipts
Receipts can be viewed in a few main ways.
- Configuring a dashboard and clicking on a receipt
- Navigating to the receipt table and clicking on a
receipt

Users are only allowed to view receipts that you have access to. To view receipts, you must be a user in the group that the receipt is associated with.
To edit receipts, your group role must allow editing receipts (such as the Legacy Editor or Legacy Owner role).
Adding Receipts
Receipts can be added manually by:
- Navigating to the receipt table, and clicking on the add
button

- Clicking the add button on the sidebar, then clicking on add
receipt.

If AI is configured, then receipts can be added via AI as well. Check out the AI section.
Managing Receipts
Once a user has navigated to a receipt, the following screen will show. 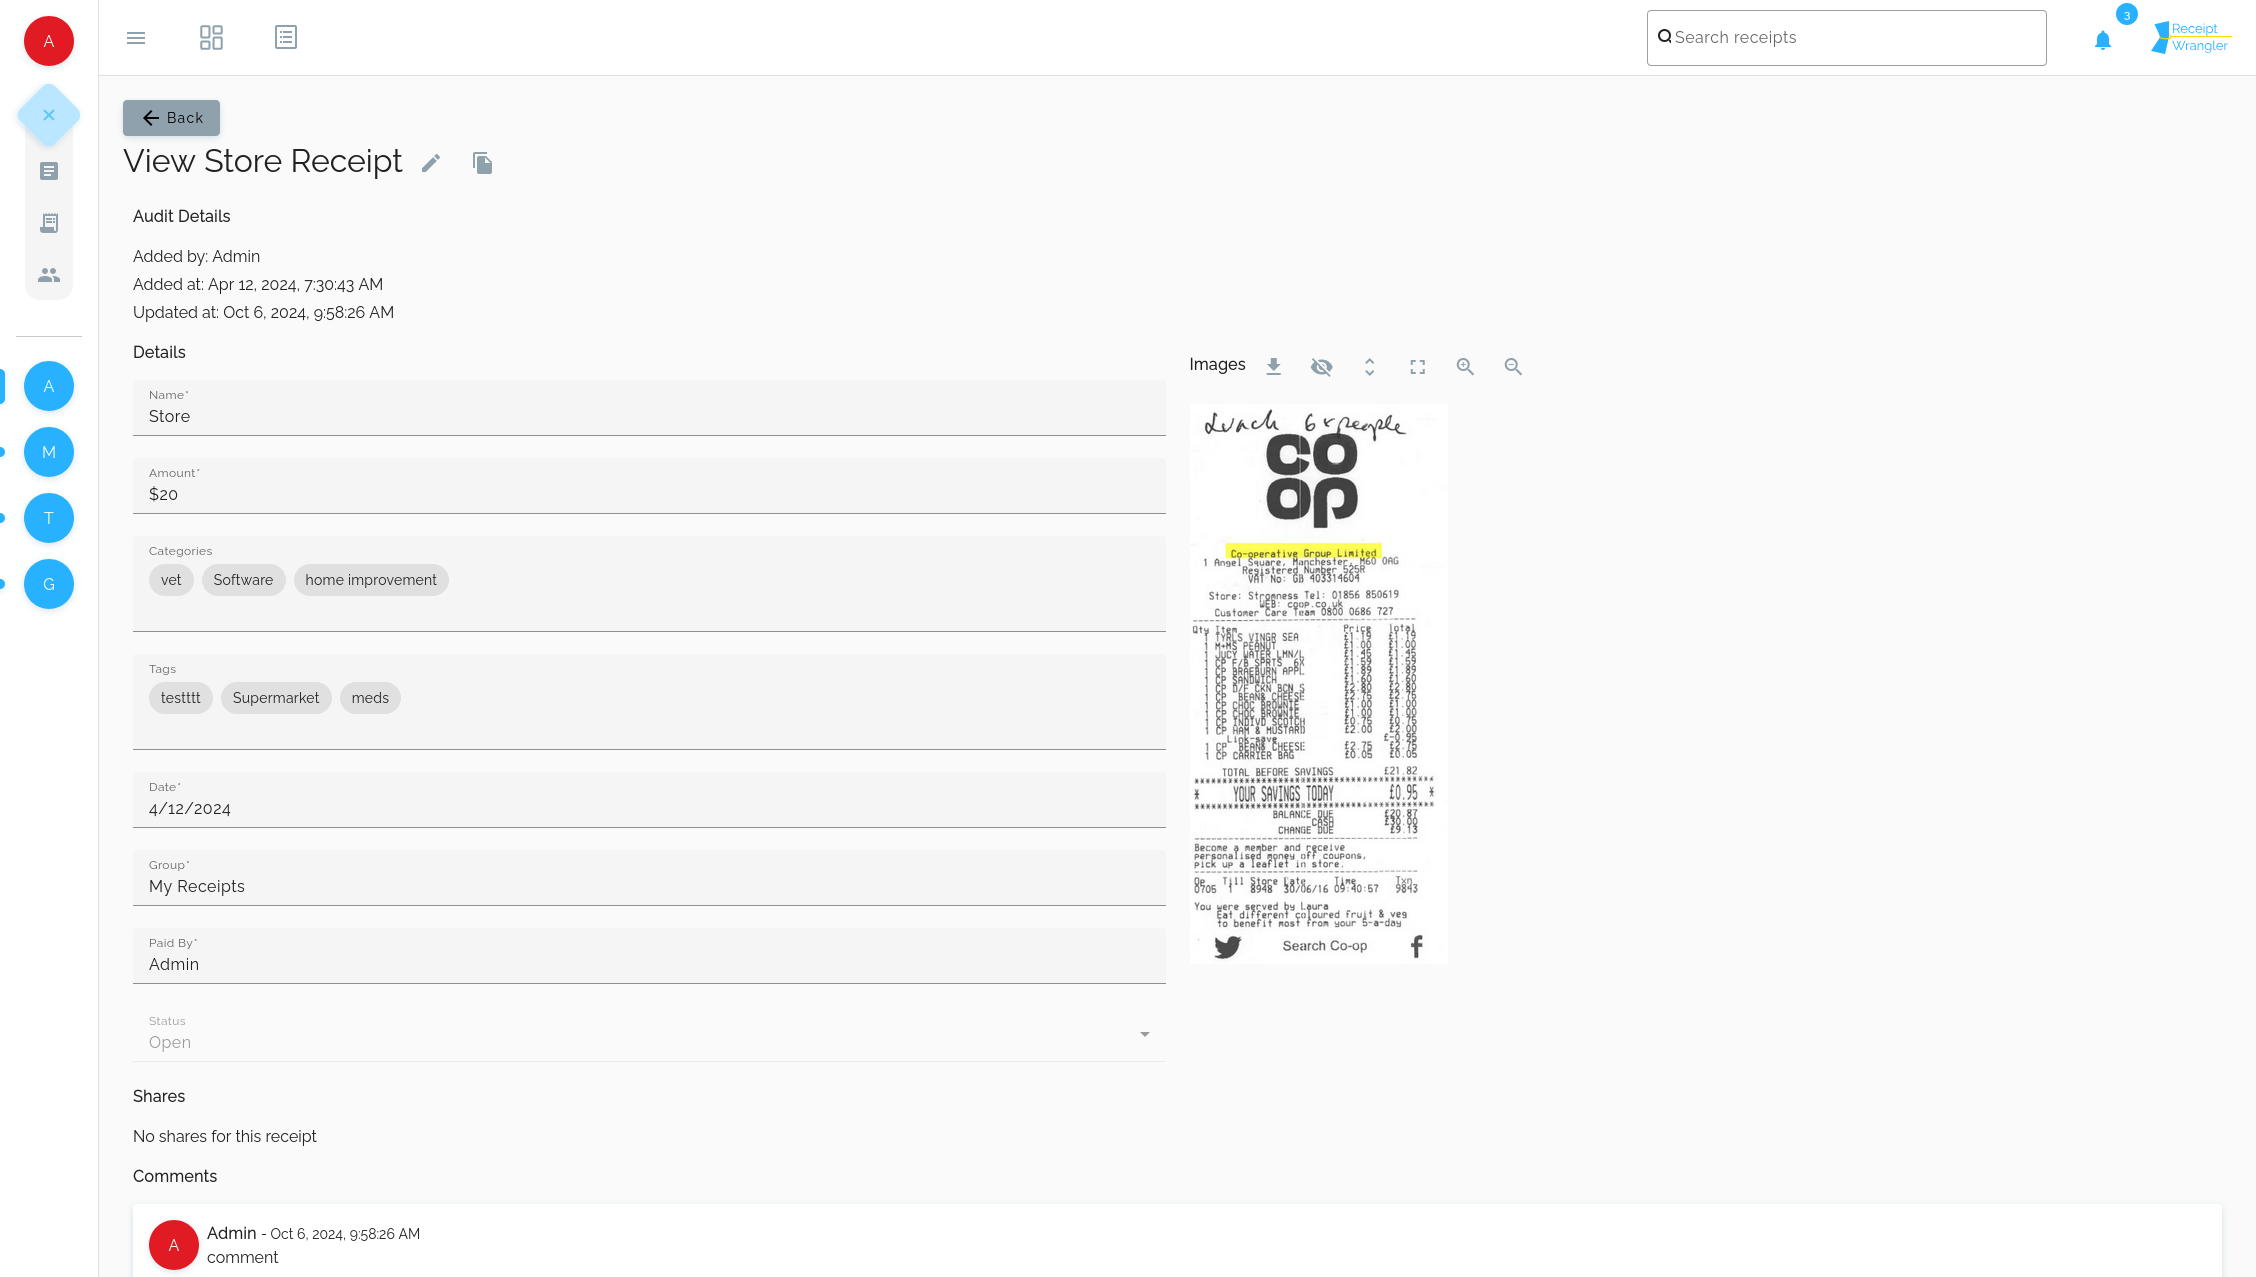
Name
This field is the name of the receipt, only used to help users identify what the receipt is.
Amount
This field is the total amount paid for the receipt.
Categories
This field lets users associate categories to receipts. This allows users to broadly group receipts, which can be later filtered on, for example: "Food", "House", "Vacation", "Bills", etc. If the category that the user wants does not exist, it will be created upon creating/updating the receipt.
Tags
This field lets users associate tags to receipts. This allows users to group receipts in a more granular way, which can be later filtered on, for example: "Delivery", "Grubhub", "Gas Bill", "Electricity Bill", etc. If the tag that the user wants does not exist, it will be created upon creating/updating the receipt.
Date
Date of the receipt.
Group
Group that this receipt belongs to.
Paid by
User who paid for the receipt.
Status
Status of the receipt. These are for the user to define, but below a description will be given for the intended use and how each behaves. The options are:
- Draft: Initial state of the receipt. When the receipt status is changed to this status, all the receipt items' status will be set to draft as well.
- Open: Receipt data is complete and is ready to be resolved. When the receipt status is changed to this status, the receipt items' status will remain unchanged.
- Resolved: The receipt has been resolved in some way, i.e the users who owe the user who paid have paid, or have settled the payment in some other way. When the receipt status is changed to this status, the receipt items' status will change to resolved.
- Needs Attention: The receipt has an issue that needs to be addressed. When the receipt is changed to this status, the receipt items' status will remain unchanged.
Shares
Shared with (On add)
Who the share belongs to. This user will be a user of the group that the receipt is assigned to.
Name
Name of the share.
Amount
Total amount of the share.
Status
- Draft
- Open
- Resolved
The intended meaning of each status is the same as receipt statuses above.
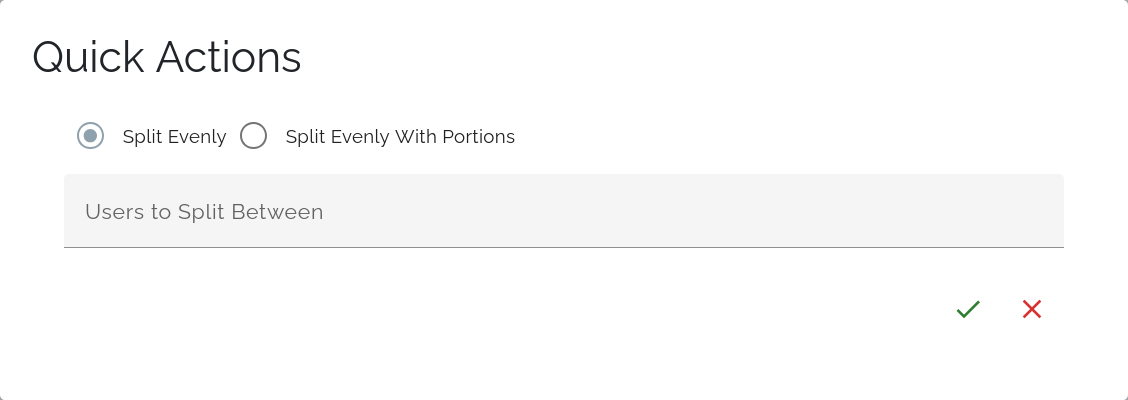
Quick Actions
Quick actions meant for users to be able to quickly split the receipts in different ways. Clicking the split icon will
open quick actions.

Split Evenly
Splitting evenly allows users to split the receipt evenly between any number of users in the group. Simply select the users to split between, then shares will be added for each user.
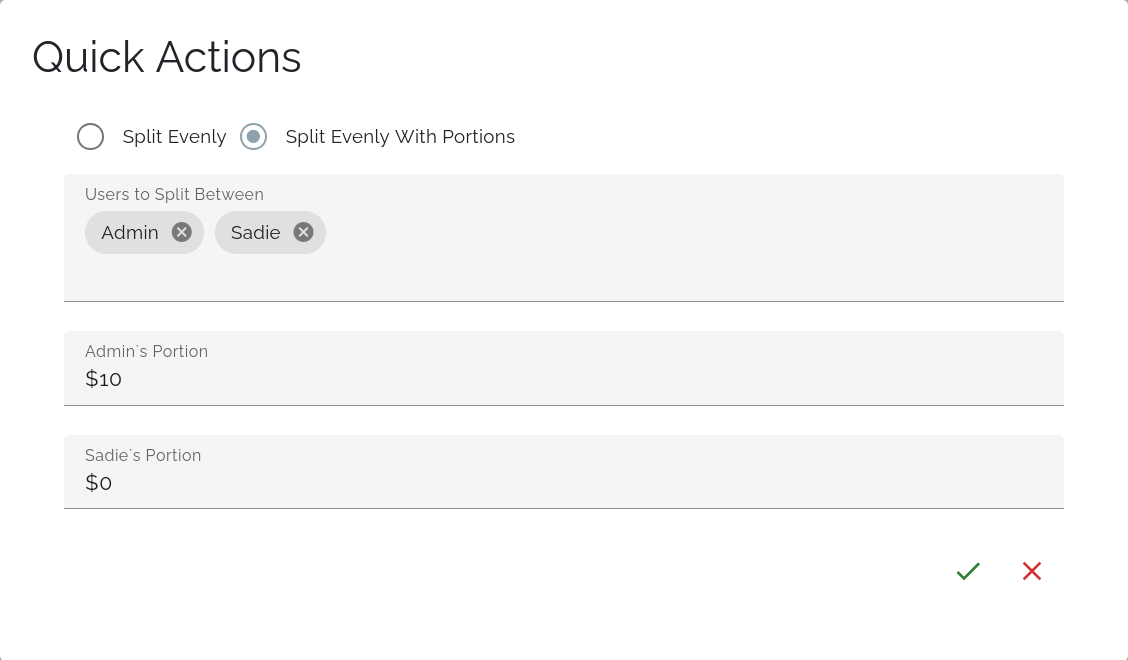
Split Evenly With Portions
Splitting evenly with portions allows users to split evenly, but adding a custom amount to a user's share. For example, if we have two users: Admin and Sadie. Let's say they went to the grocery store together.
Admin and Sadie pay for stuff that they both use, but Admin also really wants to get a pair of shoes at the store too. This item is for Admin specifically, and Sadie doesn't want to pay for this. In this case, Admin will add the pair of shoes to his portion so that Sadie doesn't pay for it, and then the rest will be split evenly.
How shares work
The shares section is one of the most important areas of a receipt. They represent what a user is paying for. Really, this is itemization. Shares can be assigned to other users within the group. The shares dictate who owes who money.
Let's use 3 users as an example.
The example users we will use:
Jim with a share of: $30
Bill with a share of: $10
Bob with a share of: $10
Let's say our receipt was paid for by Jim, with a total amount of $50. Since Jim paid for the receipt, this means that Bill and Bob owe Jim $10 each.
If Bill pays his $10 to Jim, then we can set his item(s) to resolved. Bill's resolved shares, or draft shares will not count towards him in the calculations used to calculate how much he owes other users.
Bob will still show that he owes Jim $10 since his share is not resolved.
Comments
The comments section is a place where users can add notes about the receipt.
Images
In the images section, users can perform multiple actions per image. Below is the image section in edit mode. In view
mode some of the buttons below will appear, but not all of them. We will go over the buttons from left to right.

Upload Image(s)
This button will allow users to upload an image, or multiple images to the receipt.
Download Image
This button will download a single image that is currently selected in the image section.
Hide Images
This button will hide all the images in the image section.
Expand Image
This button will expand the image(s) in the image section.
Show Fullscreen Image
This button will show an image in fullscreen mode.
Zoom In
This button will zoom into the image that is currently selected.
Zoom Out
This button will zoom out of the image that is currently selected.
Magic Fill (AI Required)
This button will perform magic fill. This will send the image to the configured AI to read the receipt and fill in the form with the data that it found.
Remove Image
This button will remove an image from the image section.