Managing Roles
The Roles page is where administrators view, create, edit, and delete roles. To get there, click the user avatar and choose Manage Roles.
The roles list
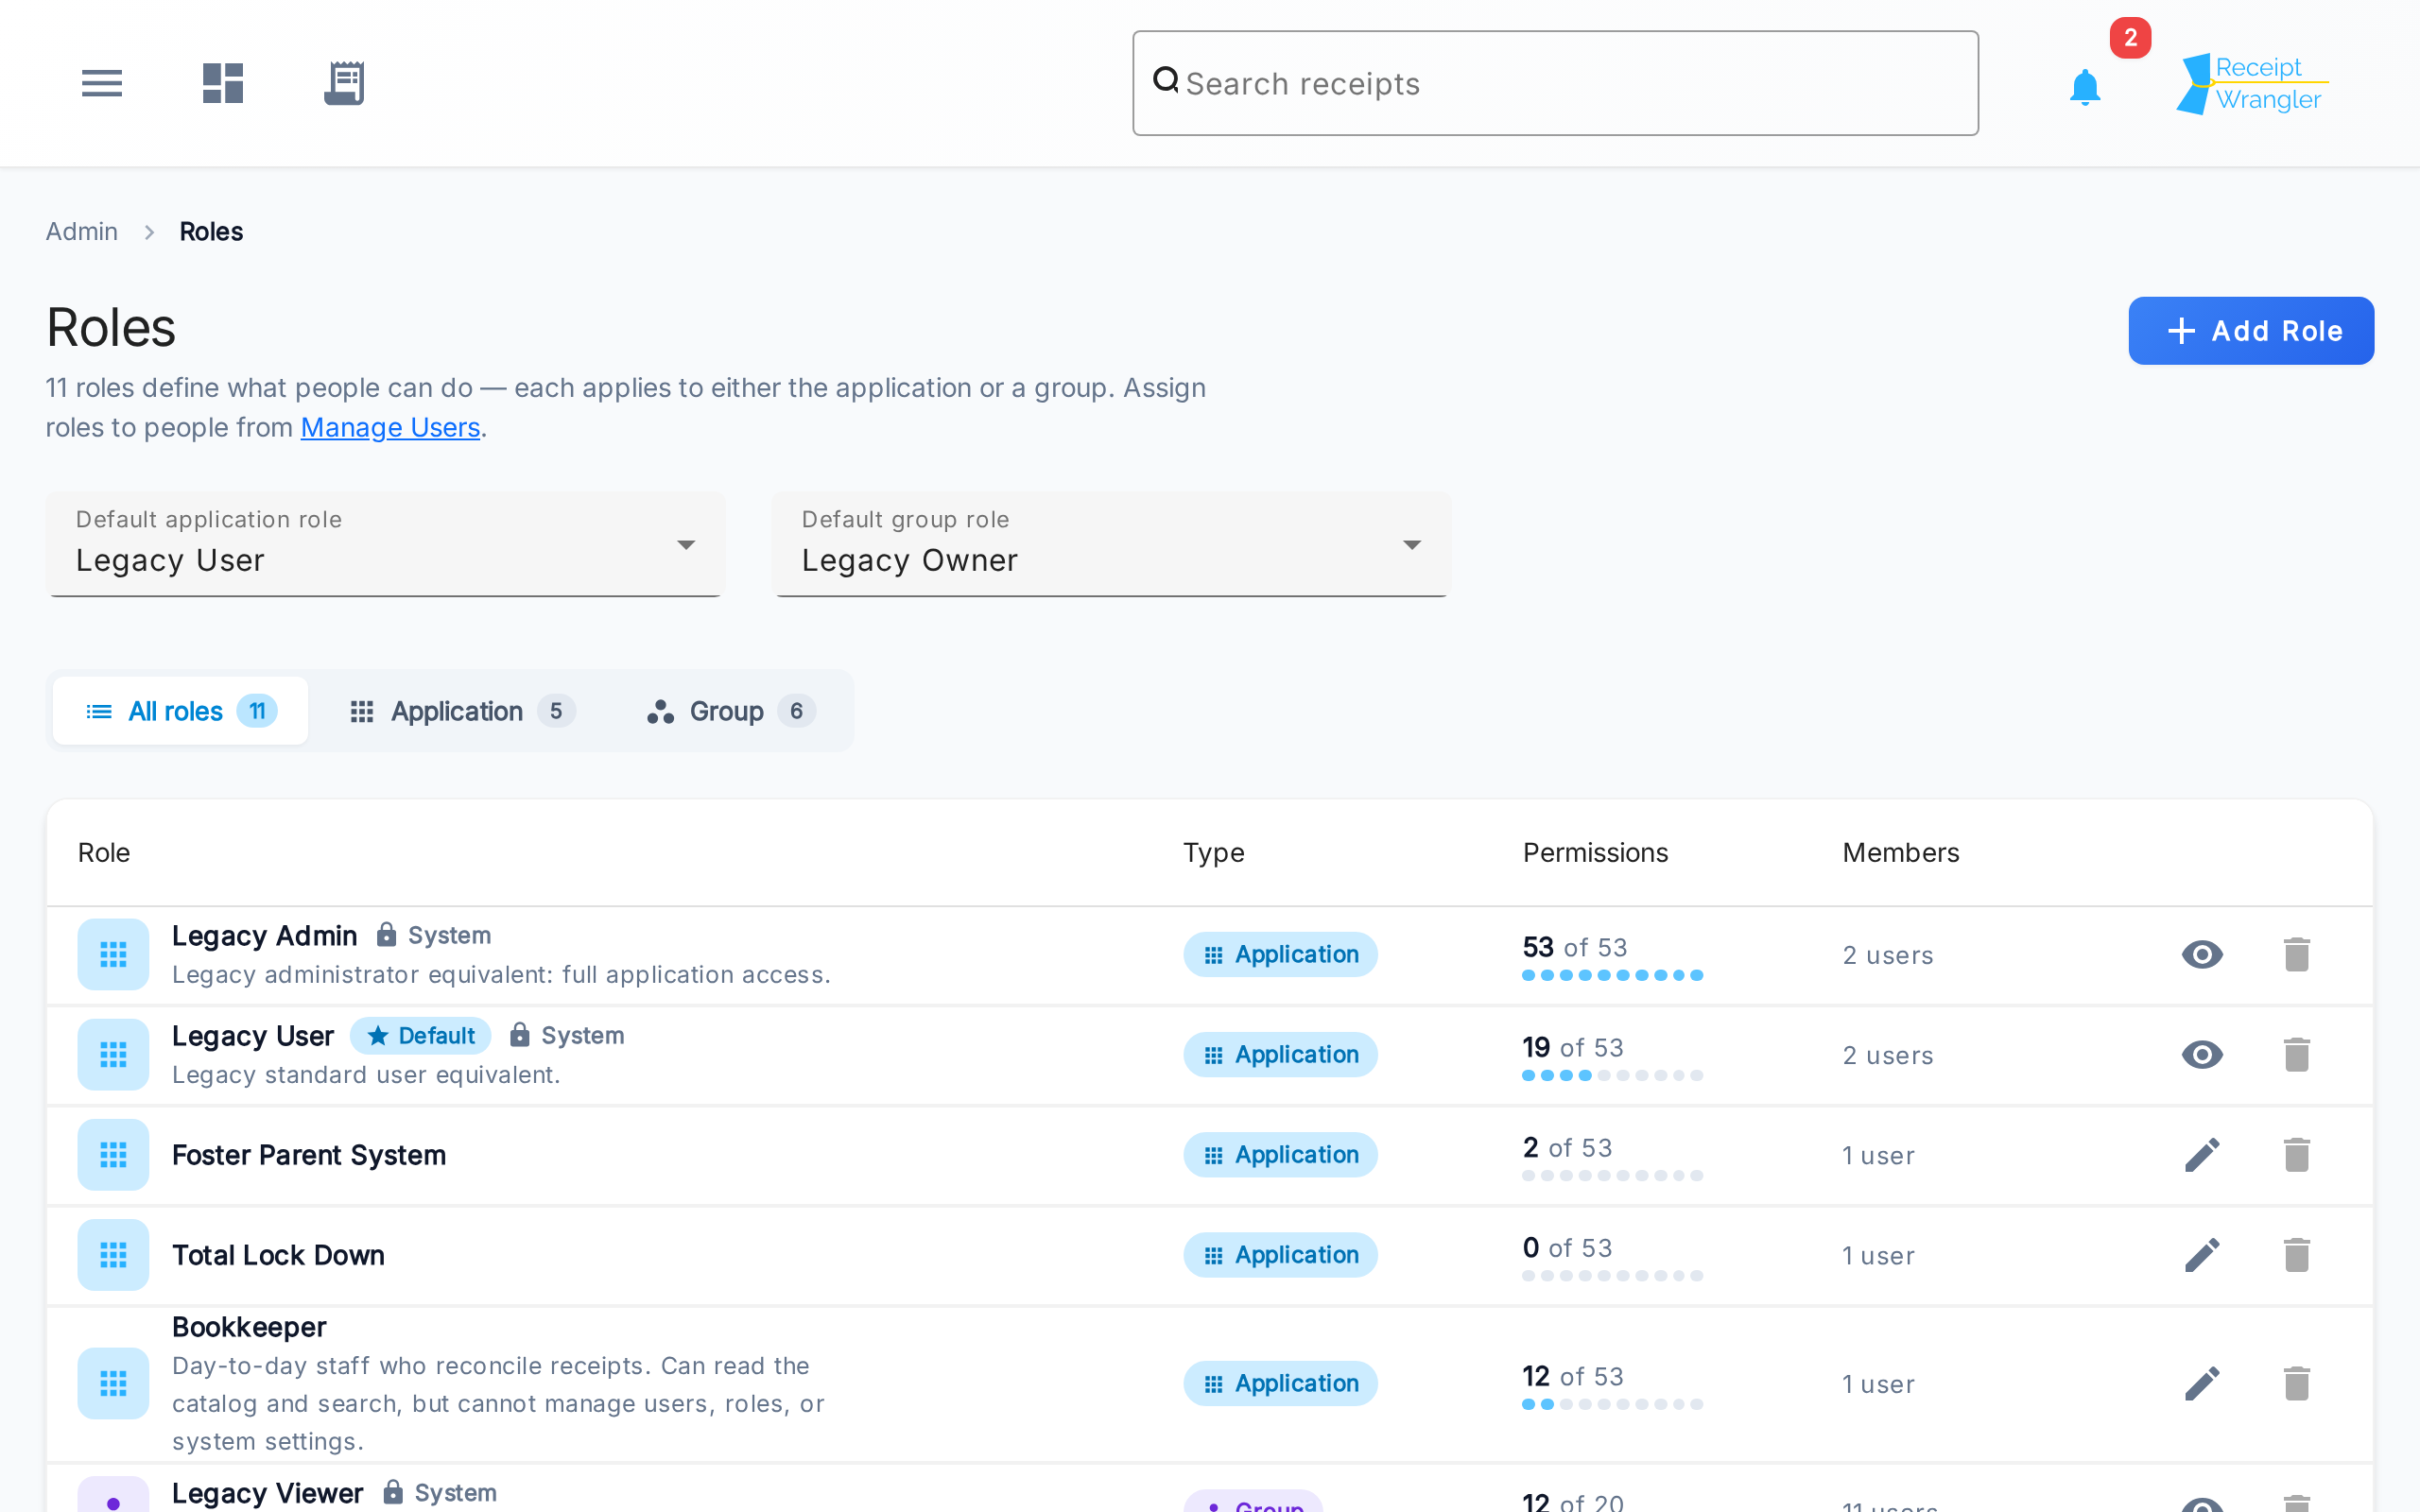
The list shows every role in the installation. Across the top are the two default role selectors and a filter; below them is a table of roles.
Default application role / Default group role
These two selectors show which role is currently the default for each scope. Changing a selector makes that role the new default — the default application role is given to every new account, and the default group role is given to whoever creates a group. Setting a new default automatically clears the old one, and the current default cannot be deleted.
Filter
The segmented control filters the table to All roles, Application roles, or Group roles. Each tab shows a count so you can see at a glance how many of each you have.
The table
Each row describes one role:
- Role — the role's name and description, with a Default badge if it is the default for its scope and a System badge if it is a built-in role.
- Type — whether the role is an Application or Group role.
- Permissions — how many permissions the role grants out of the total available for its scope, with a small meter for a quick visual sense of how broad the role is.
- Members — how many people are currently assigned the role.
- Actions — edit (or, for system roles, view) and delete.
Adding, editing, and deleting
- Add Role (top right) opens the role form to create a new role.
- The edit action opens an existing role for changes. System roles open in a read-only view instead, since they cannot be changed.
- The delete action removes a role. A role can only be deleted when it is not a system role, is not the default for its scope, and no one is assigned to it. Reassign its members to another role first, then delete it.
Creating a role
Click Add Role to open the role form.
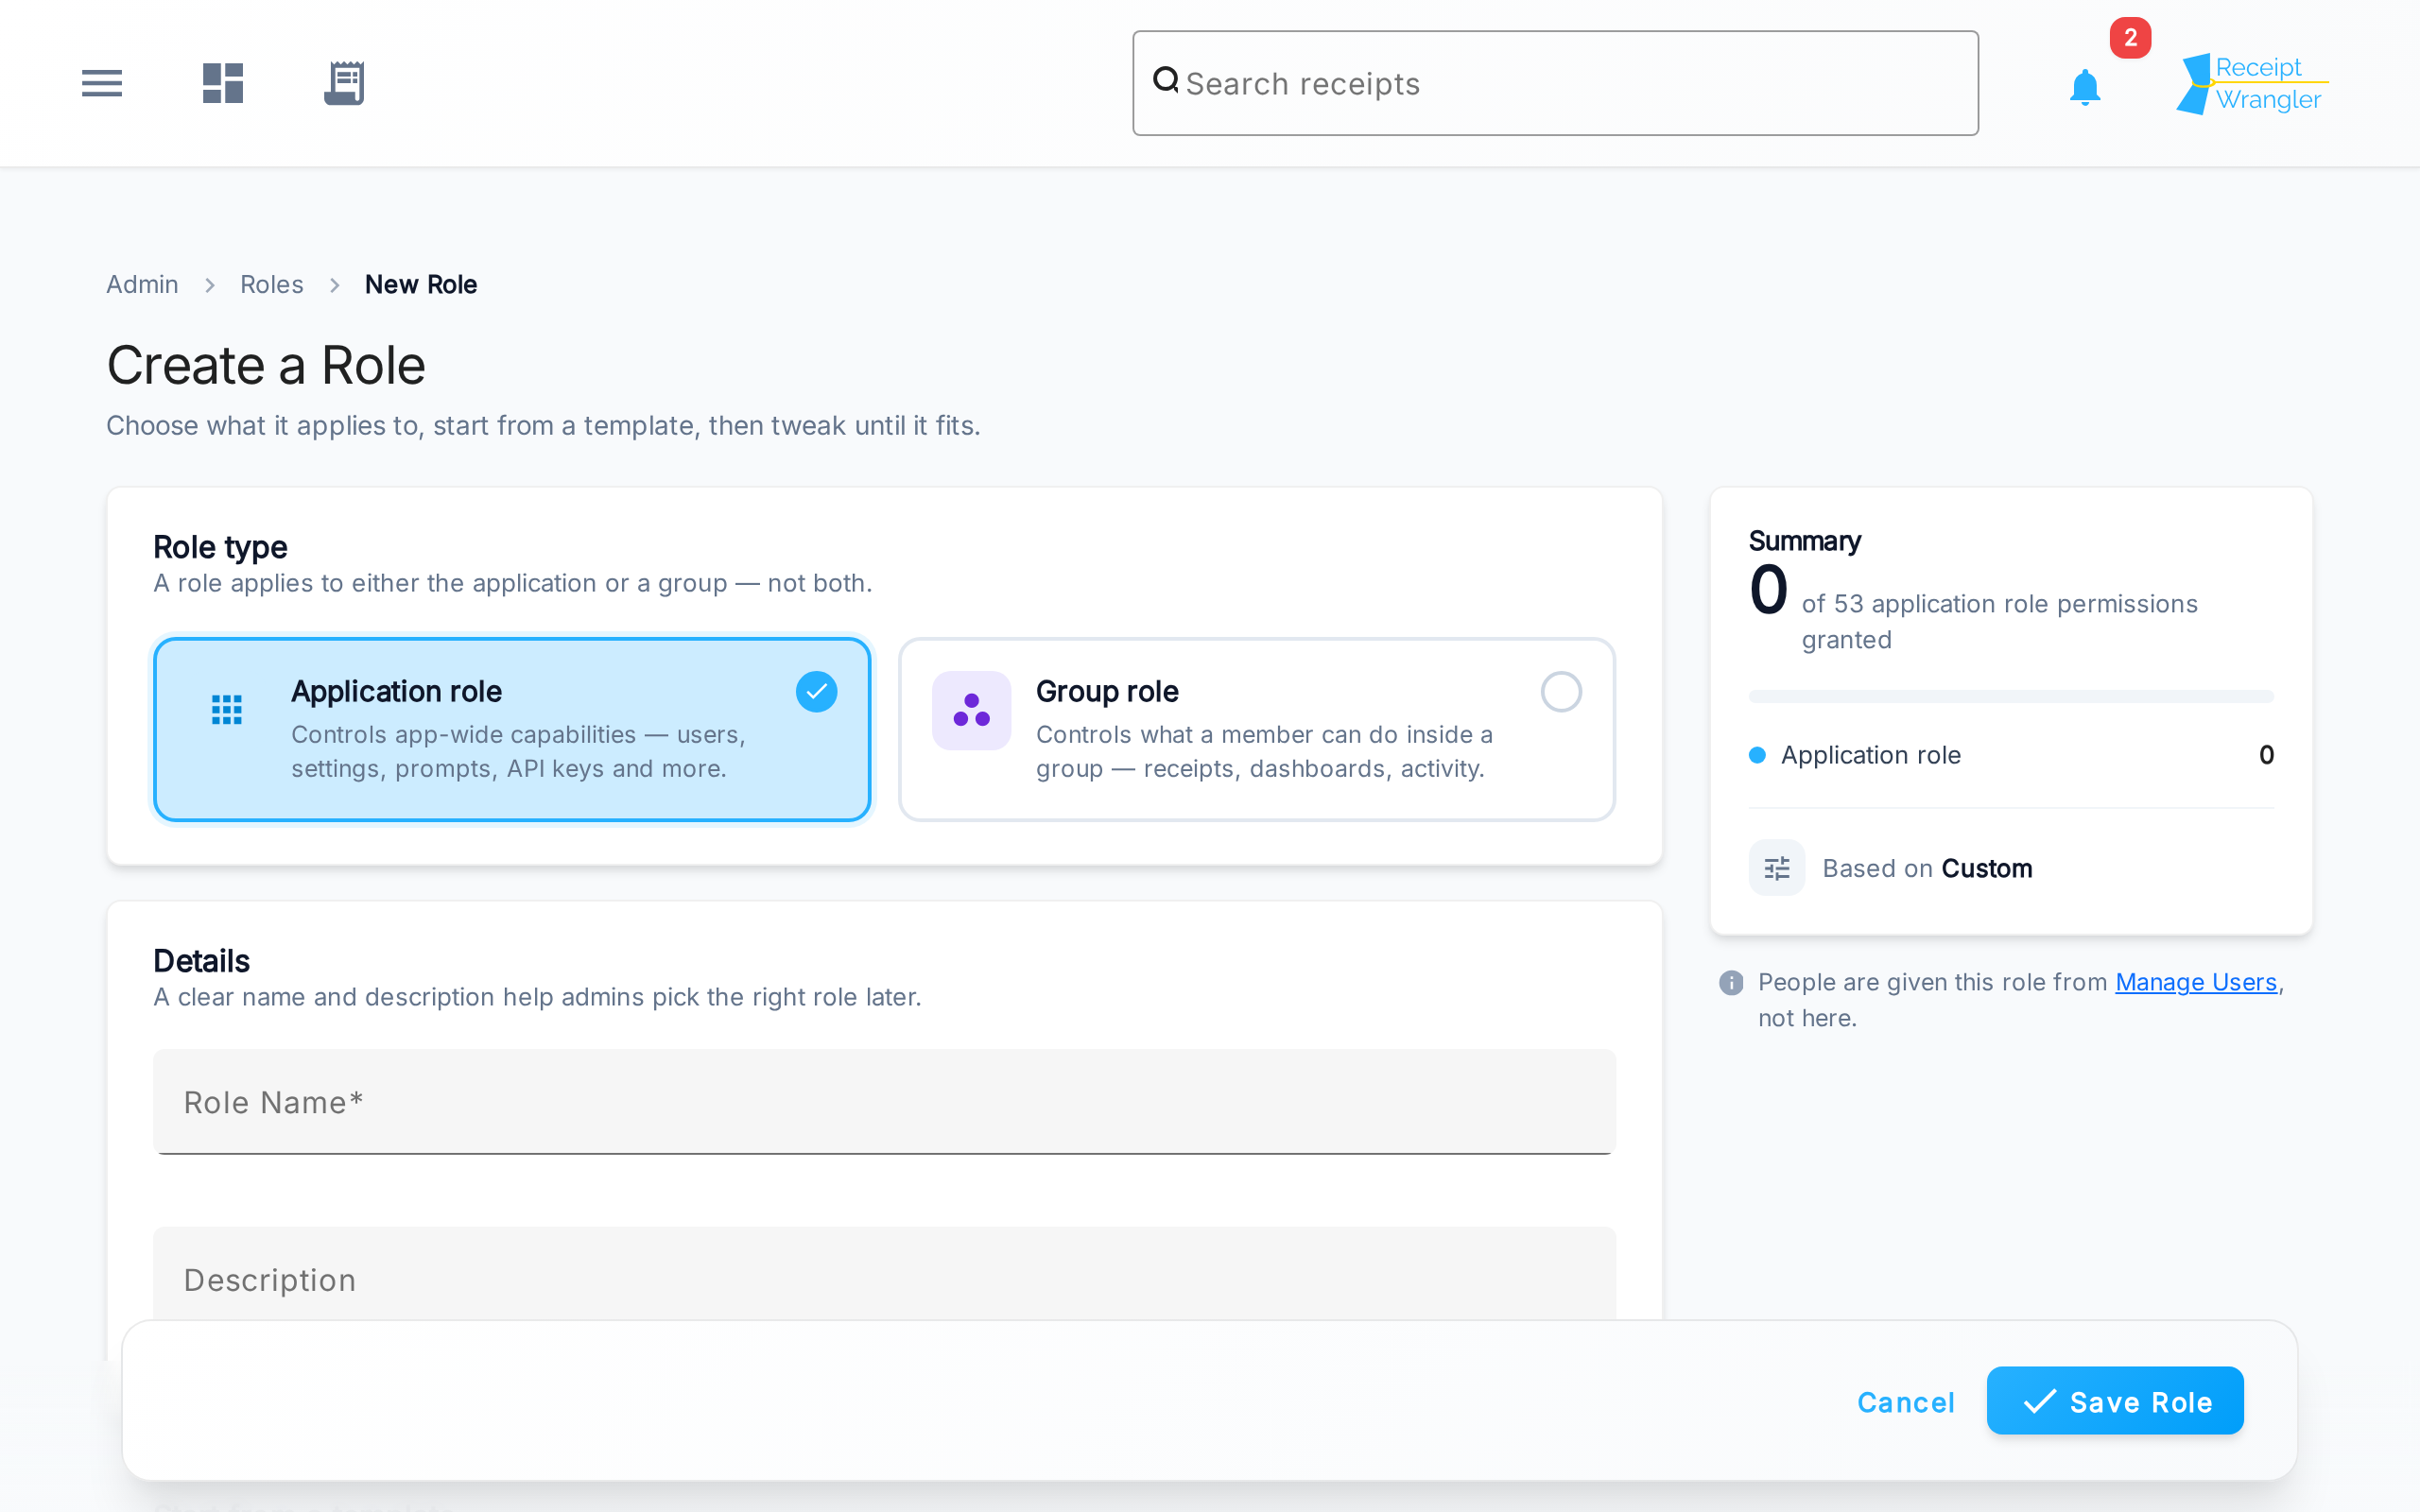
The Summary panel on the right keeps a running count of how many permissions you've granted as you build the role.
Role type
Choose whether this is an Application role or a Group role. The choice changes which templates and permissions are available, since the two scopes have completely different permissions.
A role's type is fixed once the role is saved — it can't be switched between application and group later. If you picked the wrong type, create a new role instead.
Details
Give the role a Name and an optional Description. A clear name and description make it much easier for administrators to pick the right role when assigning it later.
Start from a template
Templates are pre-built starting points so you don't have to flip every permission by hand:
- Application roles: Administrator (everything), User Manager (manage users and keys), Read Only (view settings), or Custom (start from scratch).
- Group roles: Group Manager (run the group and its receipts), Receipt Editor (add and edit receipts), Viewer (read-only), or Custom (start from scratch).
Picking a template fills in a sensible set of permissions; you can then change any of them.
Permissions
The permissions section is where you fine-tune exactly what the role can do. Permissions are grouped by resource (Users, Receipts, Dashboards, and so on).
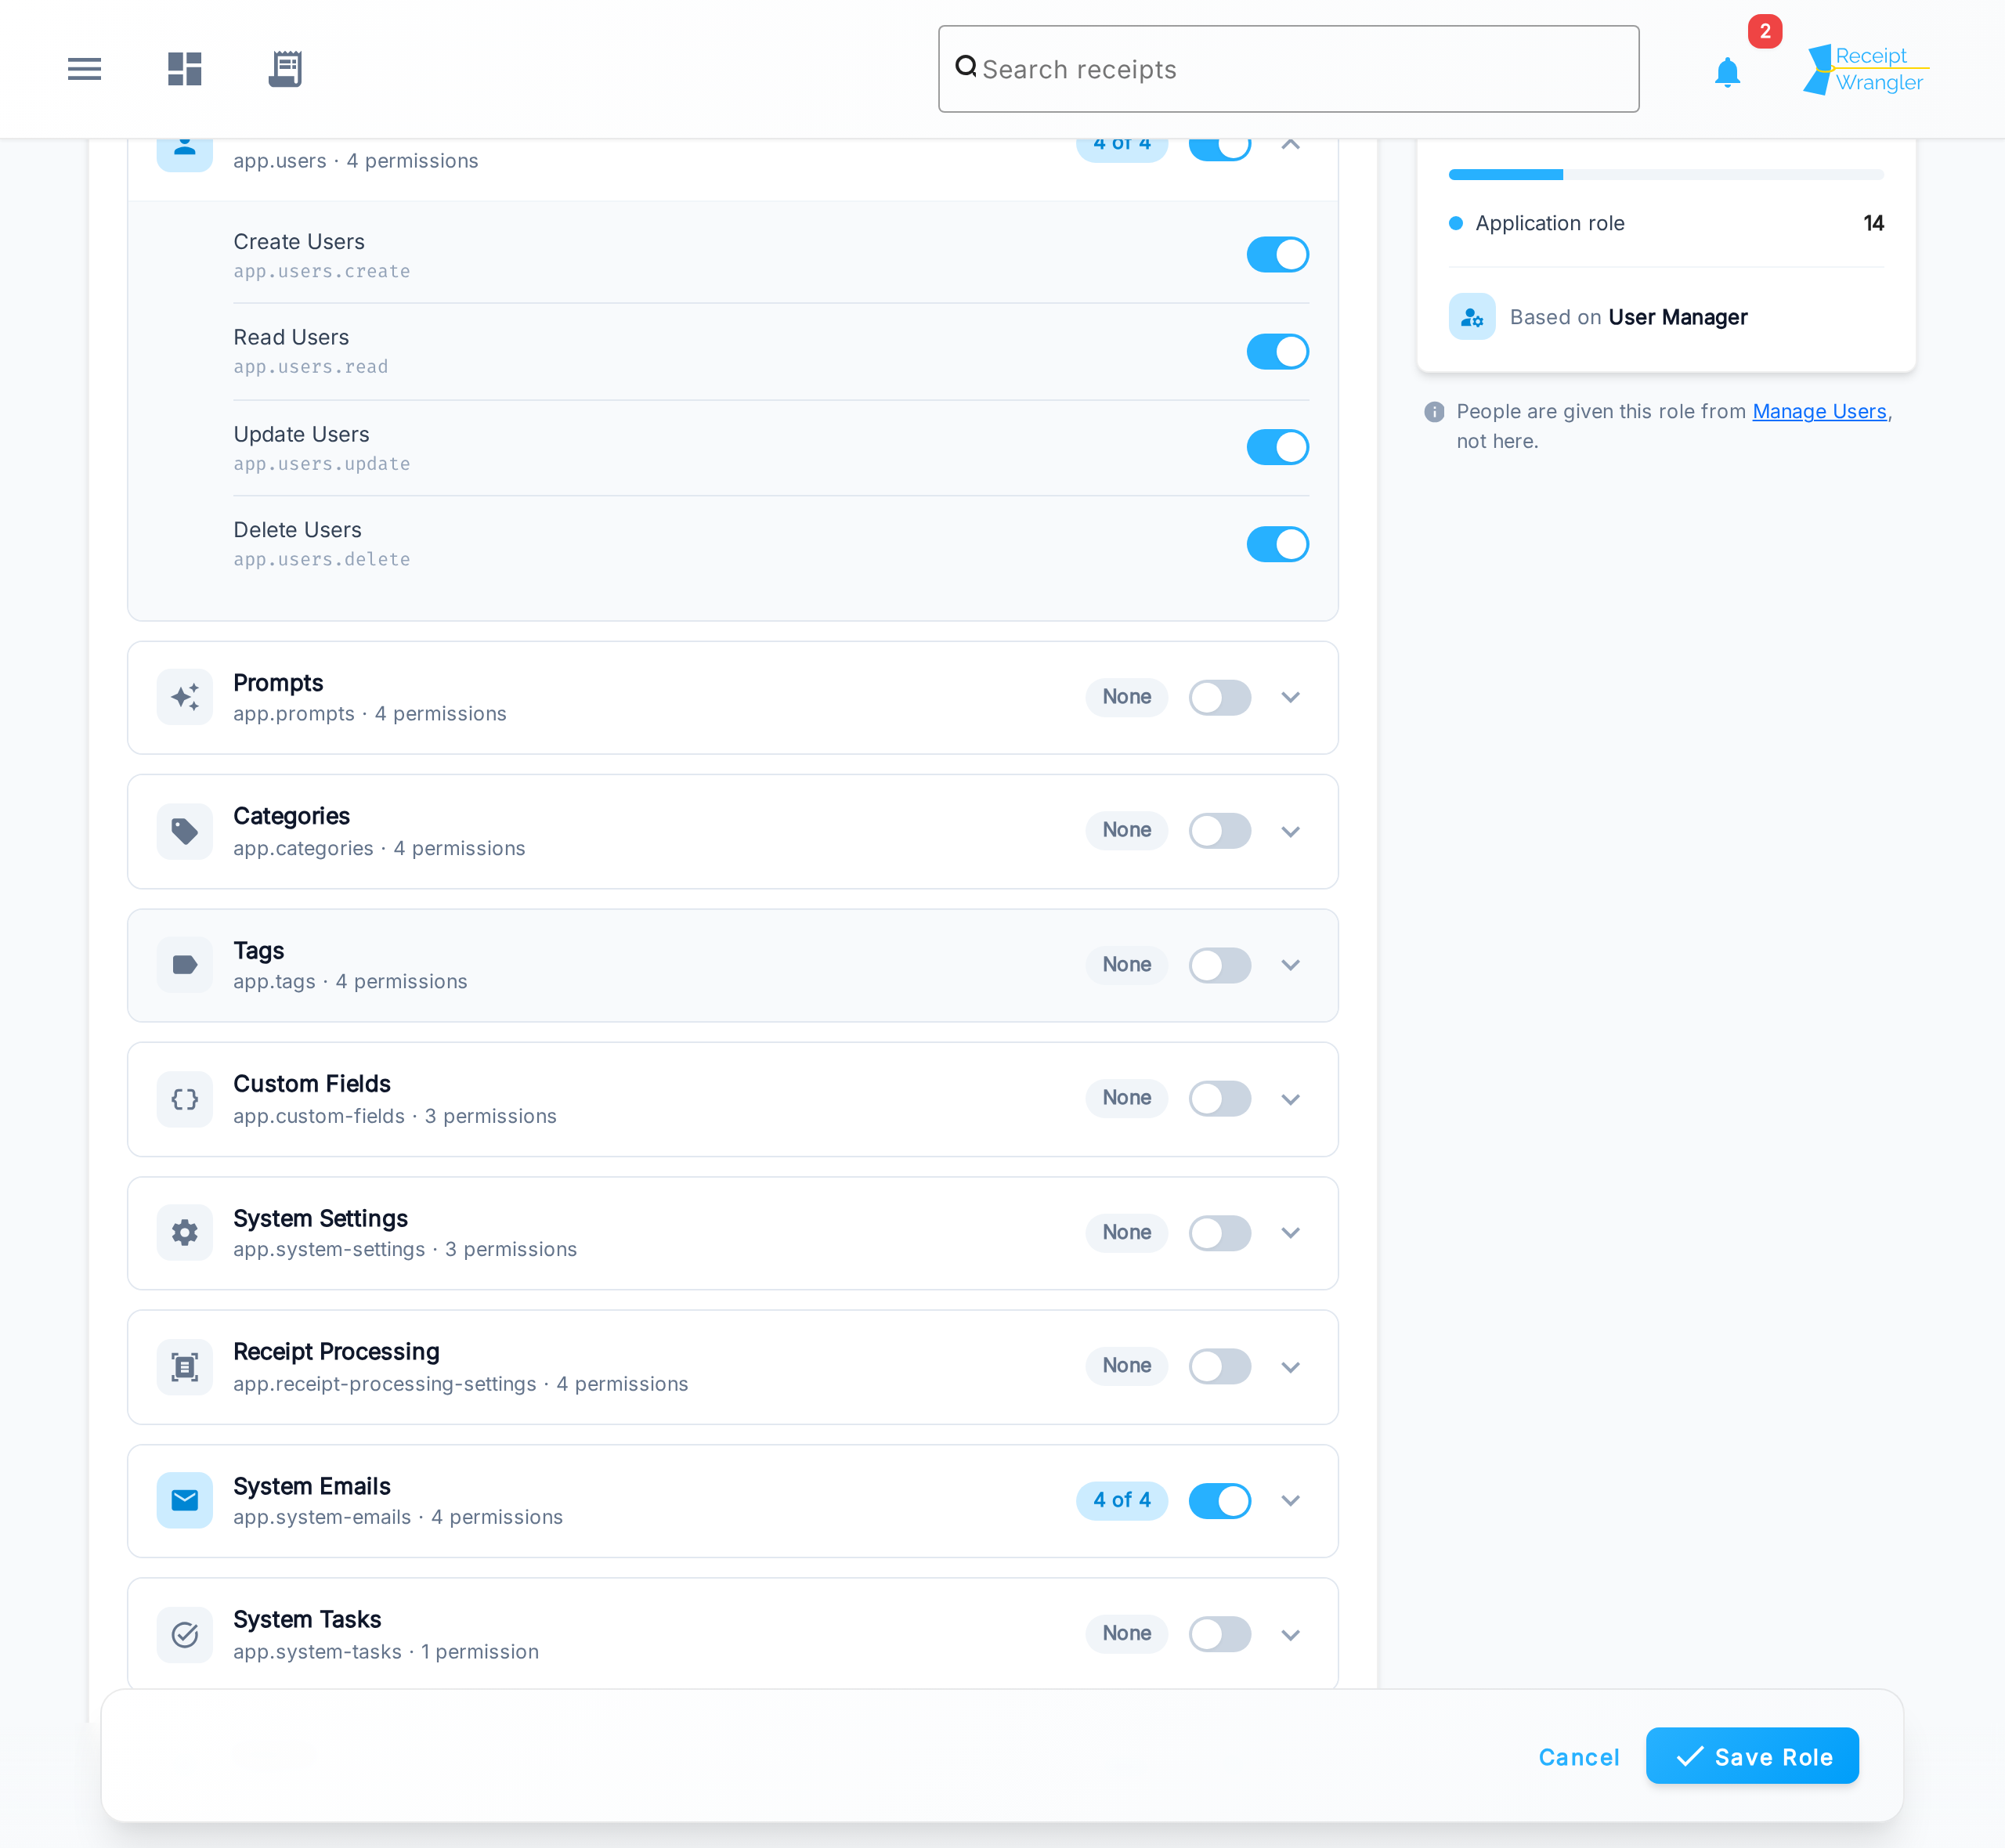
Each resource row has a toggle that turns the whole group of permissions on or off at once. Expand a resource to see and toggle its individual permissions — for example, you can grant Read Users without granting Delete Users. For a complete list of every permission, see the Permissions Reference.
Category & tag access
Group roles have two extra sections that application roles don't. The first is Category & tag access.
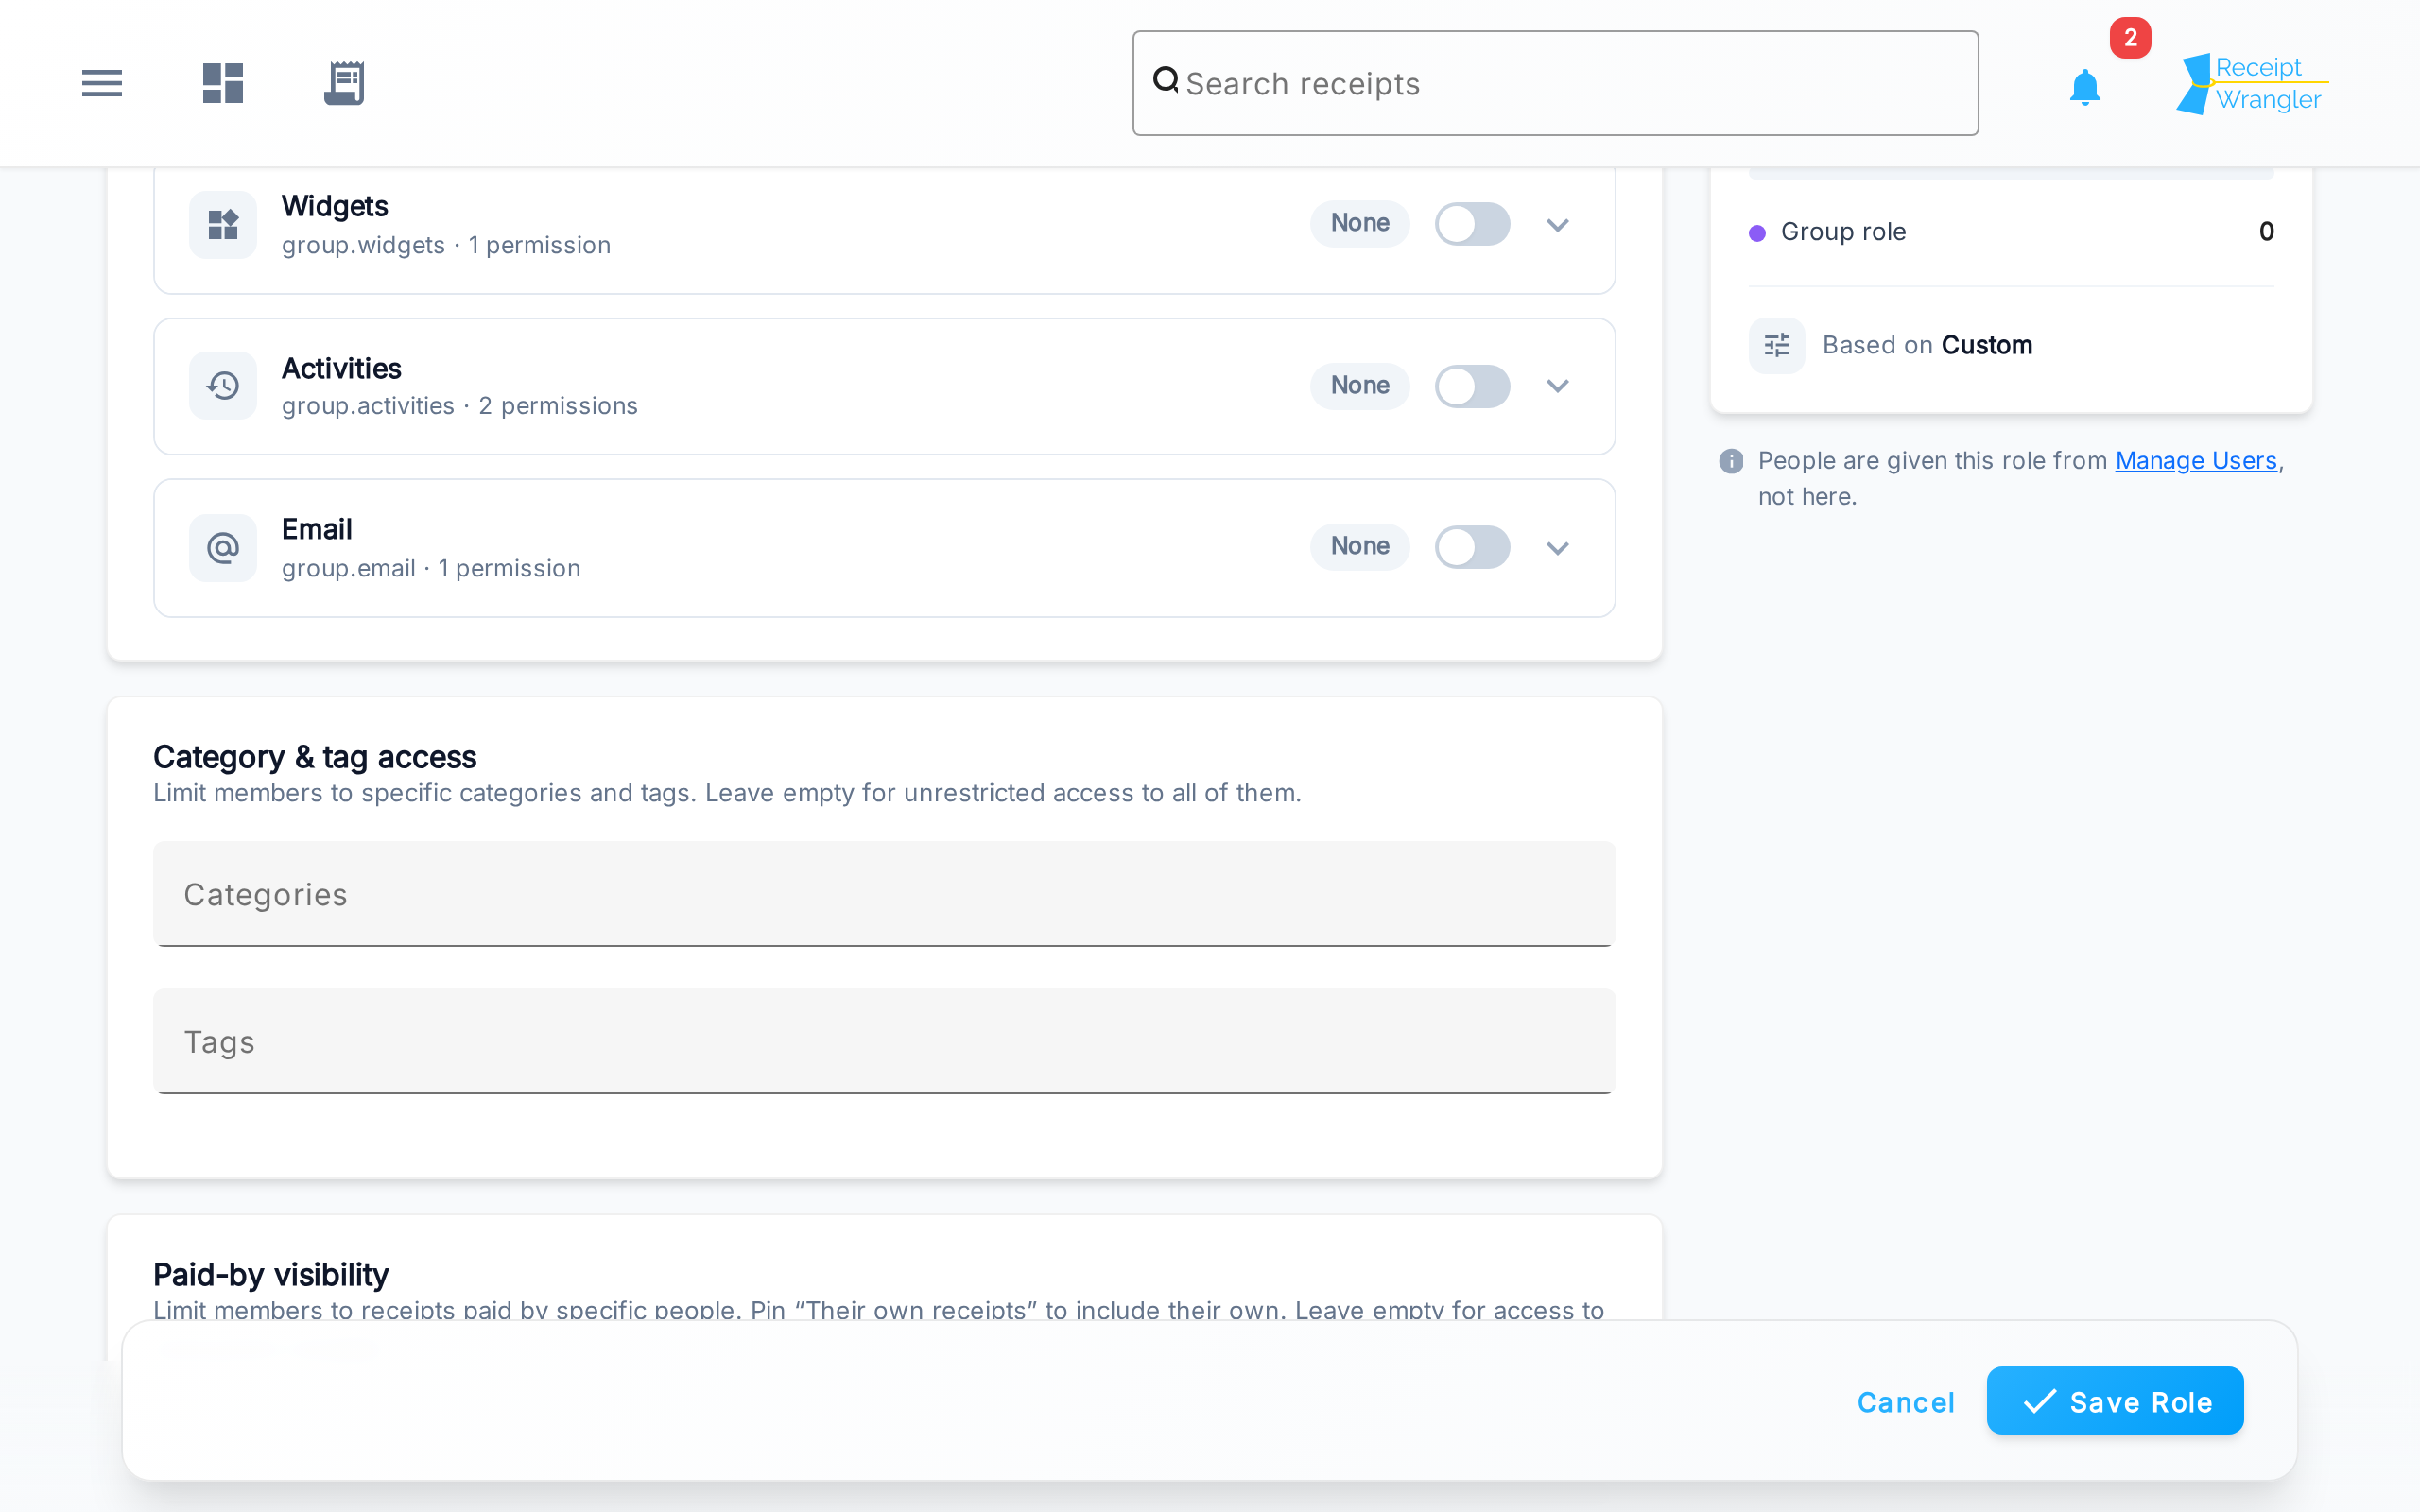
By default a group role can see every category and tag. Add categories or tags here to restrict members with this role to only those — receipts will still be visible, but the categories and tags they aren't granted are hidden. Leave both empty for unrestricted access to all of them.
Paid-by visibility
The second group-only section is Paid-by visibility, which limits which receipts a member can see based on who paid for them. Add specific people to restrict members to only their receipts, and pin Their own receipts to also include the member's own. Leave it empty for access to every payer's receipts.
Category and tag access hide fields on a receipt that's still visible, while paid-by visibility hides the whole receipt. Both are opt-in: an empty section means no restriction.
When you're finished, click Save Role.
Editing a role
Editing works exactly like creating, except the role type is locked and the form is pre-filled with the role's current settings. Changes take effect immediately for everyone assigned the role.
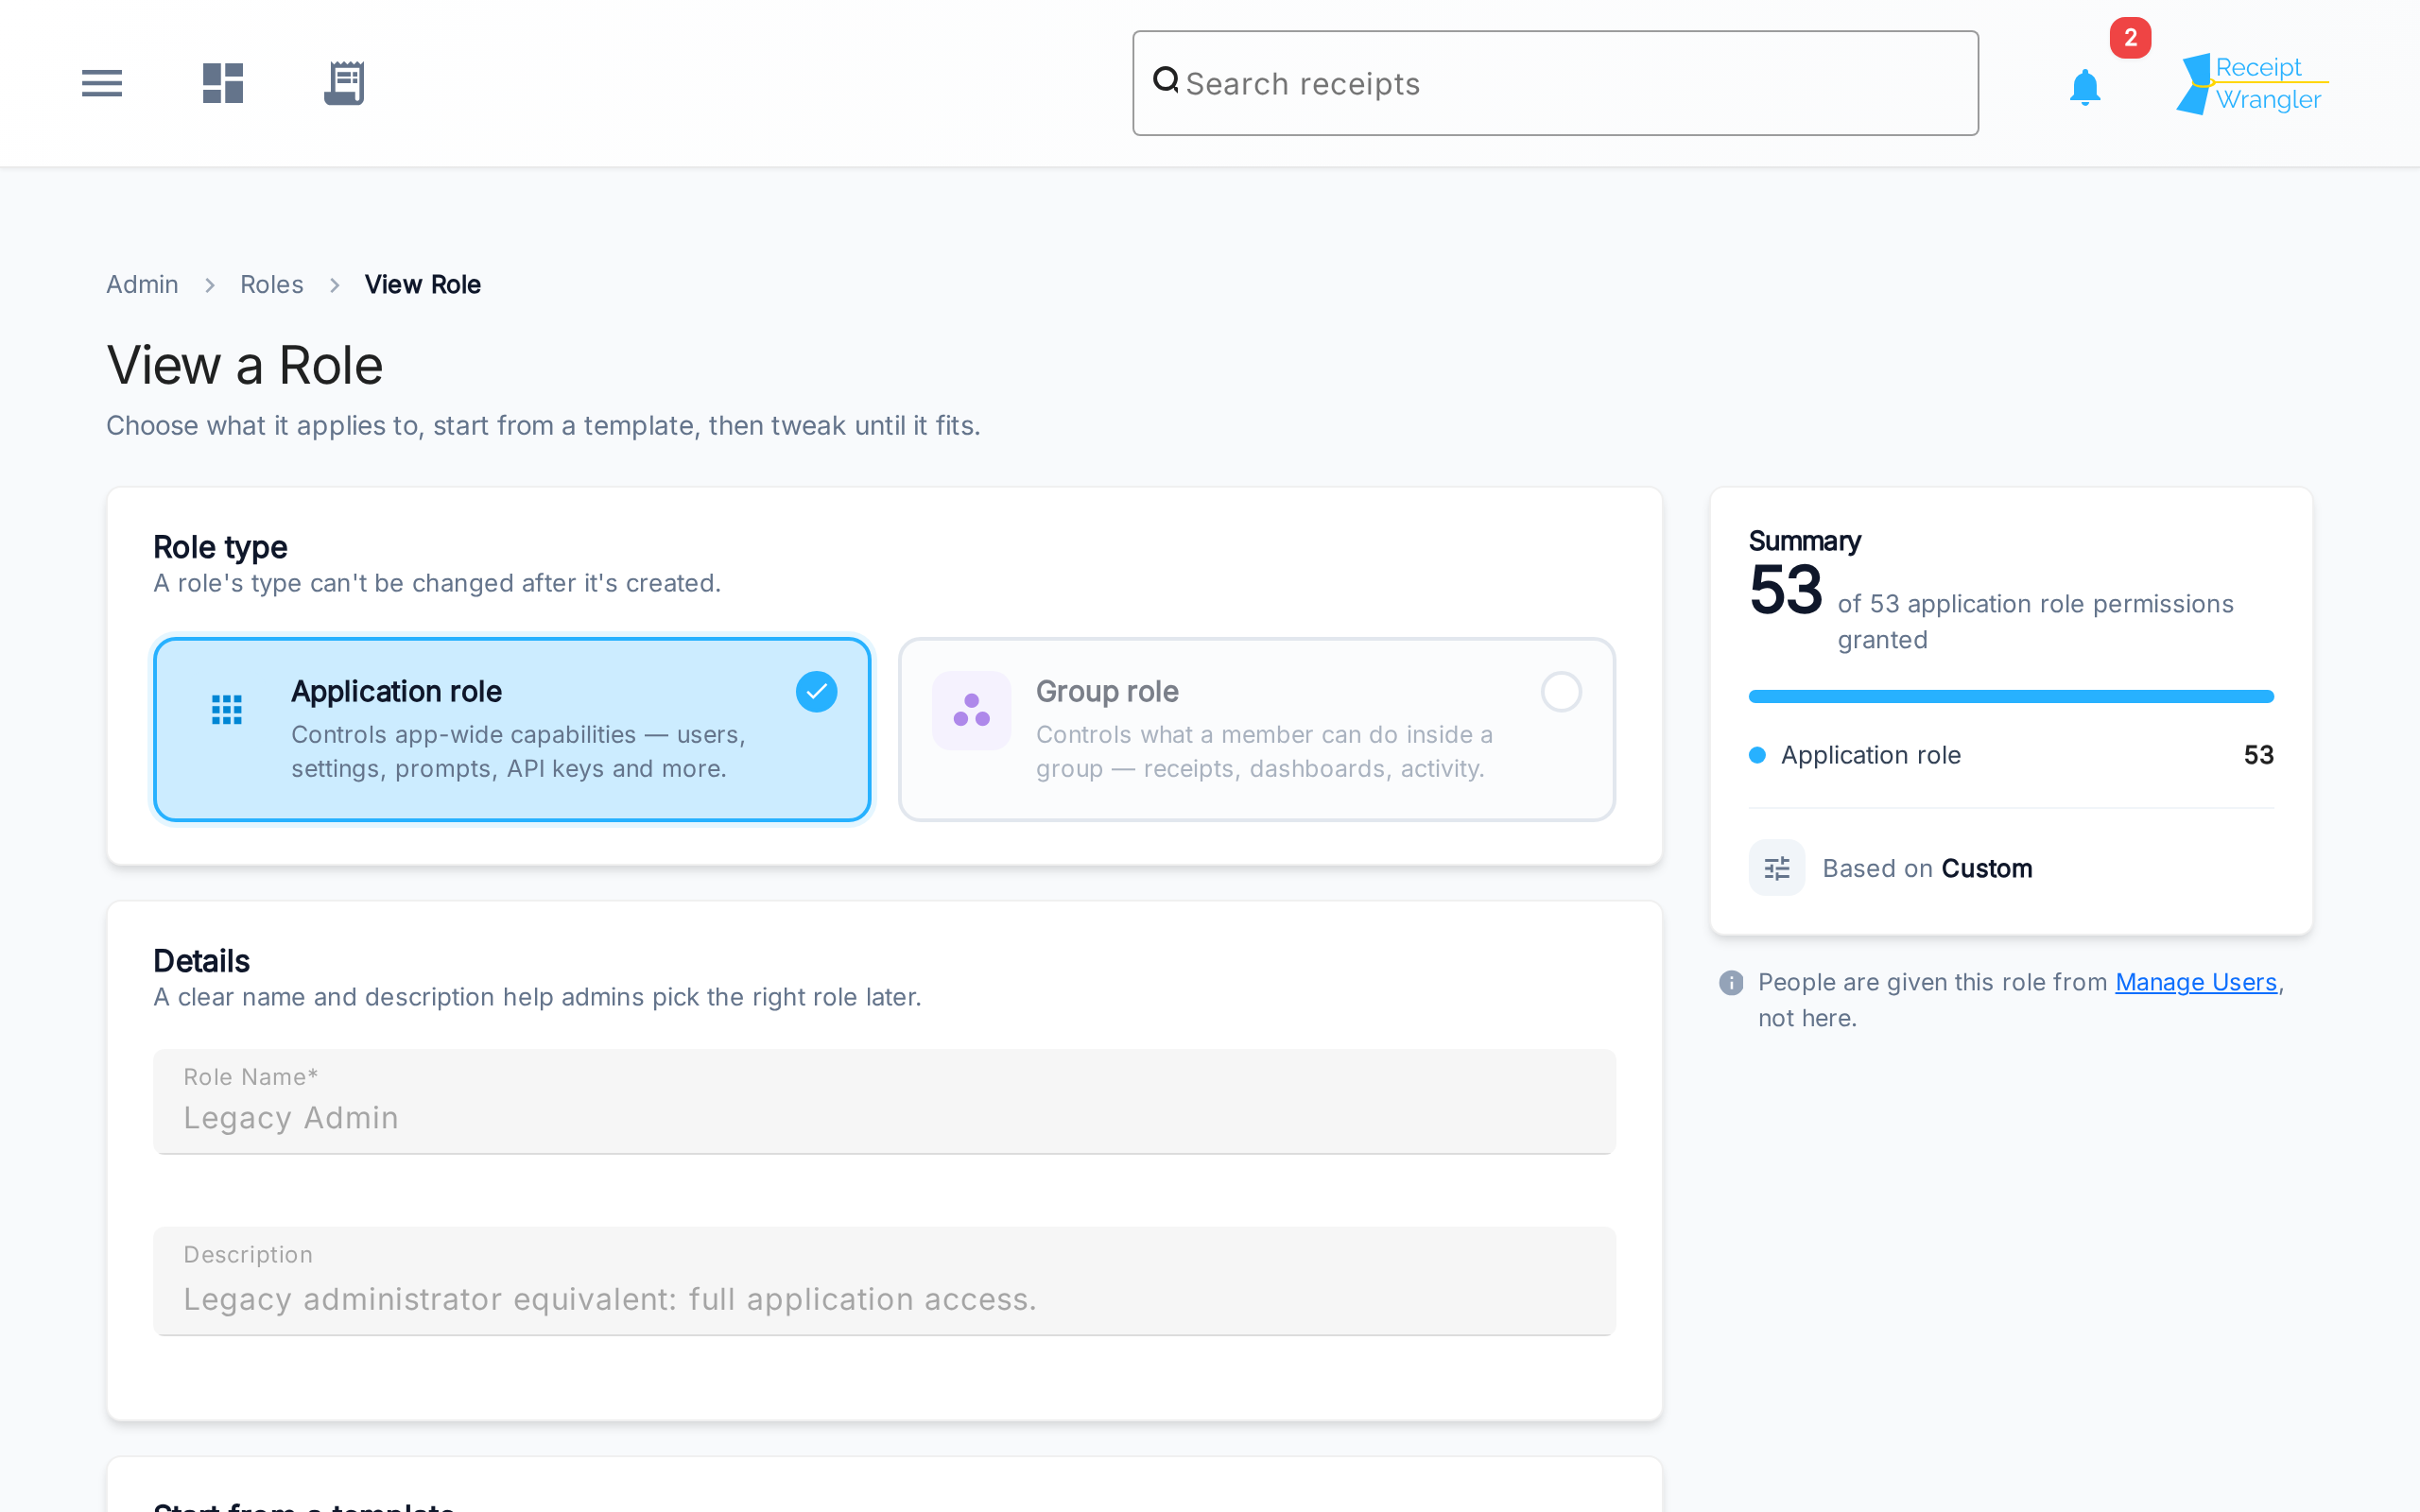
Viewing a system role
System roles (the Legacy roles) can't be changed, so their action opens a read-only view rather than an editable form. You can inspect everything the role grants, but the fields are disabled.